Adobe Photoshop
Adobe Photoshop is a graphics editing program developed and published by Adobe Systems its used by professionals, experts and novices alike.
Adobe Photoshop is a graphics editing program developed and published by Adobe Systems its used by professionals, experts and novices alike.
GRAPHICS FOR BEGINNERS' BEGINNER
Tutorial Photoshop, for Beginners...
PHOTOSHOP FOR BEGINNERS...
HOW TO DO SIMPLE OBJECTS...
How to do designs on Photoshop; this fan-like object done only by using one tool " PEN TOOL",
LEARN HOW TO USE PEN TOOL IN PHOTOSHOP:
Rotating Blades- Photoshop
CS
OPEN PHOTOSHOP
.
If you know what is 'CS' in Photoshop much better, It stands for "Creative Suite" read a bit of CS series Photoshop.
(Illustrator 11 became Illustrator CS, Golive 7 became Golive CS, Indesign 3 becomes Indesign CS.)
Fig.1
Fig.1 - I have taken Preset (setting) to Web, you can set your own setting.
PRESS ARROW ON THE LEFT CORNER (PRESET)
If you are not going to post on the Web, you can Customize you setting .
BACKGROUND COLOR
Background Contents if you set to Color - (black) straight-away you will get a black background Canvas.
HERE I HAVE TAKEN Transparent:
Fig2
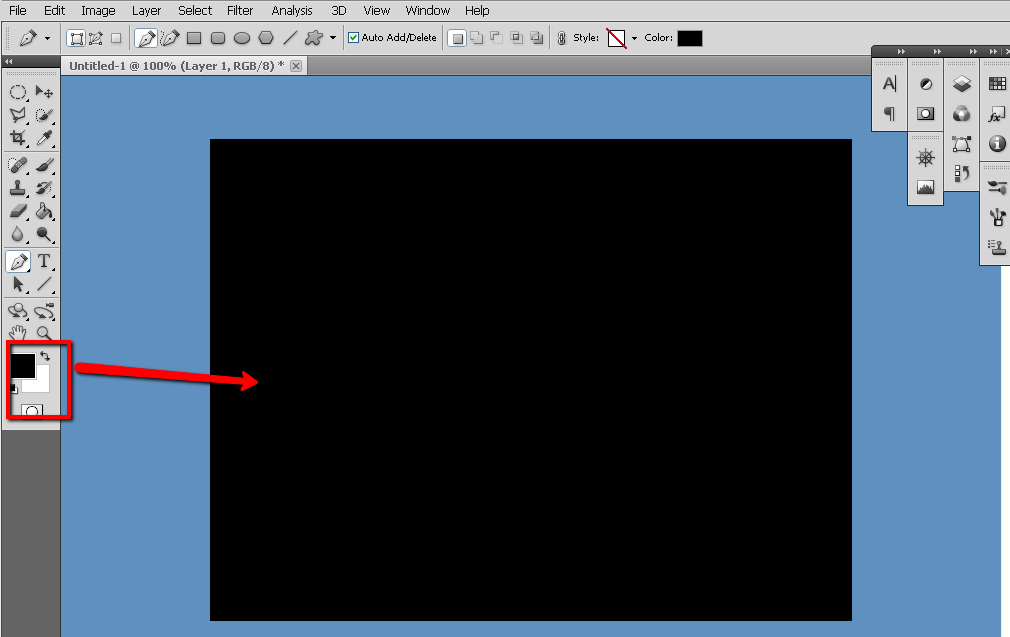
Go to Paint Bucket Tool > Click
Fig 3
Fig 4

NOW ITS TIME TO START YOUR GRAPHIC - THE HAND WORK
NOW YOU ARE GOING TO WORK ON PEN TOOL
PEN TOOL
SHAPE LAYER
When you Click PEN TOOL the Option bar pops up on the Top
Select Shape layer option.
Photoshop gives us six Shape tools to choose from – the Rectangle Tool, the Rounded Rectangle Tool, the Ellipse Tool, the Polygon Tool, the Line Tool, and the Custom Shape Tool.
The Shape Layers Option
Before we start drawing any shapes, we first need to tell Photoshop which type of shape we want to draw, Photoshop actually lets us draw three very different kinds of shapes –vector shapes, paths, or pixel-based shapes. Unlike pixels, vector shapes are resolution-independent and you can scale fully, which means we can make them as big as we like and re-size them as often as we like without any loss of image quality. The edges of vector shapes will always remain crisp and sharp.
In this tutorial we are about to use Vector (Shapes or Drawings - A Fan blade SHAPE).
To draw vector shapes, select the Shape Layers option in the Options Bar. It’s the first of three icons near the far left (the Paths option is the middle of the three icons followed by the Fill Pixels option on the right):
What Shape Tool can do...?
With the Shape Layers option selected, the next thing we need to do is choose a color for our shape, and we do that by clicking on the color swatch to the right of the word Color in the Options Bar:
Now Change the Color to your preference, I selected ( White ) The blades color.
just get the middle (no need exactly)
VECTORS
Vectors are lines, whose curvature, thickness, and length are determined by mathematical formulae. You don’t need to know any math; it’s all done for you. If you want a shape like a circle, your job is to simply draw the circle; Photoshop defines the center point and the radius to create a circle. At that point, you can specify the circle’s color, line thickness, and so on.
Fig 5
Click in the middle with the pen selected go right up click with-in the Canvas or even you can go out and click (here you'll not get a edge) click again to your 'right' (about 3/4 inch) as indicated by red small butterflies.
Now your first blade is set.
Don't forget to hit Enter.
If gone wrong ; no worry,
Go to Edit and undo,
delete all and redo,
or try Esc and see whats the results is.
Study well the changes for each activity.
Practice, Practice and practice well
Fig 6
Now the LINES AROUND THE SHAPE gone.
A White shaped pointed Vector path created (a Hand Saw like object)
Now if you have a look on your Layer palette, it will look like the Diagram bellow.
(unlock the locked layer if any)
To unlock double click on the locked layer, on the pop up flyer give OK.
or click on the lock icon top of the layer palette.
Go to Move Tool...
Click Move Tool (V)
'Check' Show Transform Controls.
Don't forget to take a look at the Layer Platte.
If the vector mask not clicked (the Thumb nail; squire, dark beige on the top layer next to the White, small square) the blade will not be selected, instead the black Canvas in the background will be selected by "Transform Controls tool".
This is the most vulnerable spot.
LETS START ENABLE THE FAN BLADE TO SPIN.
Once the Move Tool is Clicked on the Tool Bar,
a new Menu Bar with SHOW TRANSFORM CONTROLS box will be opened.
TICK the small box on the left of
"Transform Controls box".
Fig 7
Once you tick the TRANSFORM CONTROLS box,
a square box with 8 handles will surround the shape:
your blade shape
Fig 8
Lets the middle center point snaps in place.
CLICK ON THE LINE OF THE transformation box TO ENABLE the following tools in Fig.9
Set the ROTATION POINT to 20.00° (20 degrees)
Hit Enter
The shape will fall down to 20.00° point.
.
ITS WORKING!!!!!!!!!
Fig 9
HIT ENTER AGAIN;
HOLD Ctrl + Alt+Shift and Hit 'T' repeatedly,
until you form your desired point...
End with Esc. to deselect selection.
Fig 10
Fig 11
IN A NUTSHELL:
1.SELECT PEN TOOL
2.GO TO THE DOCUMENT , CANVAS
3.IN THE CENTER; CLICK THE FIRST POINT, SECOND AND THIRD POINTS AS SAID ABOVE.
4.WHEN THE SHAPE IS FORMED, TICK 'SHOW TRANSFORM CONTROL' TOOL
5. CLICK ANY WHERE ON THE TRANSFORM CONTROL SQUARE BOX
6.Set the ROTATION POINT to 20.00° (20 degrees)
7. HIT ENTER AGAIN;
8. HOLD Ctrl + Alt+Shift and Hit 'T' repeatedly...
9. ENTER Esc. to get rid of the deselect selection.
PRACTICE WELL AND MAKE WONDERFUL DESIGNS.
HAPPY DESIGNING.


No comments:
Post a Comment